
How to Make Custom Stencils for Any Project

Creating custom stencils is an art that merges creativity with precision. Stencils are versatile tools used across various fields, from crafting and home decor to industrial applications. This guide delves into the world of custom stencils, exploring their uses, materials, design process, and tips for creating your own.
What Are Stencils?
Stencils are templates used to apply a pattern, design, or text onto a surface. They work by masking parts of the surface, allowing the desired design to be applied with paint, ink, or other mediums. Custom stencils are tailored to specific needs, offering unique designs not found in standard, pre-made options.
Applications of Custom Stencils
Art and Craft
In the realm of arts and crafts, stencils are invaluable. They allow artists to replicate intricate designs quickly and consistently. Whether you’re decorating a canvas, creating greeting cards, or adding flair to scrapbook pages, custom stencils provide the flexibility to bring your vision to life.
Home Decor
Custom stencils are popular in home decor projects. From wall murals and furniture embellishments to floor patterns and fabric designs, stencils offer an affordable and creative way to personalize your living space. They can transform a plain wall into a stunning focal point or add a touch of elegance to everyday items.
Commercial and Industrial Use
In commercial and industrial settings, stencils are used for labeling, safety markings, and branding. Custom stencils ensure that logos, warnings, and other critical information are applied accurately and consistently. They are essential in manufacturing processes, construction sites, and even in military applications for equipment marking.
Choosing the Right Materials
Paper Stencils
Paper stencils are suitable for short-term use and simple designs. They are easy to cut and affordable, making them ideal for quick projects. However, they are not as durable as other materials and can tear easily.
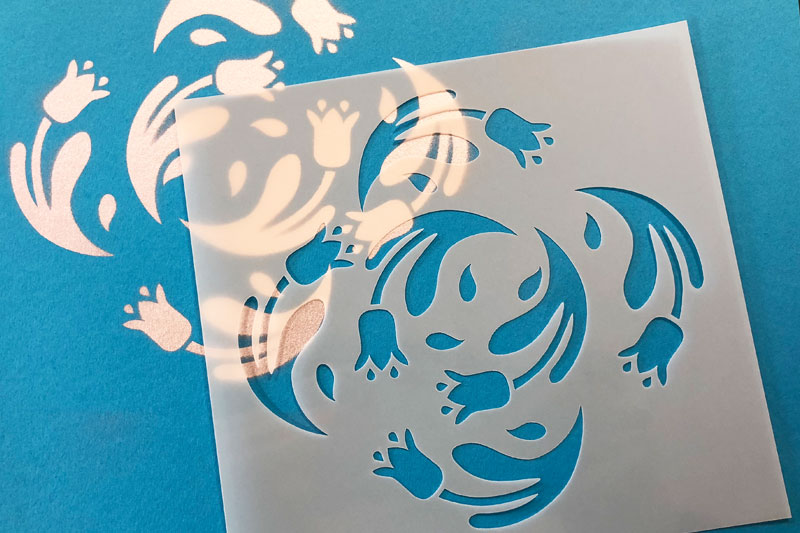
Plastic Stencils
Plastic stencils are more durable and reusable. Materials like Mylar are popular choices due to their flexibility, strength, and resistance to paint and solvents. Plastic stencils are perfect for more complex designs and projects requiring multiple uses.
Metal Stencils
Metal stencils are the most durable option, often used in industrial applications. Made from materials like stainless steel or brass, they can withstand harsh conditions and repeated use. They are ideal for high-precision work and long-term projects.
Designing Your Custom Stencil
Concept and Sketch
The first step in creating a custom stencil is conceptualizing your design. Sketch your ideas on paper, considering the details and overall composition. Think about the size, complexity, and purpose of the stencil.
Digital Design
Once you have a clear concept, transfer your design to a digital format. Software like Adobe Illustrator or CorelDRAW is ideal for creating precise vector designs. Ensure your design elements are connected to prevent pieces from falling out during the cutting process.
Cutting the Stencil
Depending on the material, you can cut your stencil by hand or use a cutting machine. For paper stencils, a sharp craft knife will suffice. For plastic and metal stencils, a laser cutter or a plotter is recommended for clean and accurate cuts.
Tips for Using Custom Stencils
Surface Preparation
Ensure the surface you’re stenciling is clean, dry, and smooth. Any dirt or texture can interfere with the stencil application and result in a messy finish.
Securing the Stencil
Use painter’s tape or adhesive spray to secure the stencil in place. This prevents shifting and ensures crisp lines. For large stencils, start from one side and work your way across to avoid misalignment.
Applying the Medium
Whether you’re using paint, ink, or another medium, apply it lightly in multiple layers. Heavy application can cause bleeding under the stencil. Use a stencil brush, sponge, or roller, depending on the size and detail of your design.
Removing the Stencil
Allow the medium to dry partially before removing the stencil. Carefully lift it off to avoid smudging. Clean the stencil immediately if you plan to reuse it, as dried paint or ink can clog the design.
Advanced Techniques
Multi-Layer Stenciling
For complex designs with multiple colors or intricate details, consider multi-layer stenciling. Create separate stencils for each layer, aligning them carefully to build up the final image. This technique requires precision but offers stunning results.
Stencil Embossing
Stencil embossing involves pressing the stencil into a surface to create a raised design. This technique is often used in paper crafting, adding texture and dimension to cards, invitations, and other projects.
3D Stenciling
For a unique effect, use thick materials like modeling paste or texture gel with your stencil. Apply the medium over the stencil, then remove it to reveal a raised, three-dimensional design. This technique is popular in mixed media art and home decor.
Caring for Your Stencils
Proper care extends the life of your stencils. After each use, clean them with warm, soapy water or a suitable solvent, depending on the medium used. Store stencils flat or hung up to prevent warping or damage.
Conclusion
Custom stencils are powerful tools that enhance creativity and precision in various projects. From simple craft designs to intricate industrial applications, they offer endless possibilities. By understanding the materials, design process, and application techniques, you can create stunning custom stencils that elevate your work. So, gather your materials, sketch your designs, and start stenciling your world with creativity and precision.